Restoring and upcycling furniture has never been so popular in recent years. It reduces costs allowing you to save money, helps you learn new DIY skills which can be therapeutic and helpful for some and most importantly, helps the environment. We’re not saying that restoring furniture is easy, but to elevate your home interior and give it extra style and character, it definitely is the way forward for traditional, modern, and contemporary properties. Whether you’re a new learner, or a professional furniture restorer, there’s something quite fulfilling when you pluck a piece of furniture and restore it to it’s former glory! While most people can see furniture way past it’s expiration date, or that it has no use now that it’s old, and worn, some of us see great possibility, and opportunity. Before we get started on a few furniture ideas and how to restore these particular pieces, please note the following:
- Before you start any kind of project, you’re going to need tools, and potentially a checklist if you like to be organised! Because we’re talking furniture, you have a pretty good idea on what tools and equipment you’ll need. They can consist of sandpaper, screwdrivers, plastic gloves, safety glasses, measuring tape, wood glue, wood oil and more. You will have a better idea on what you’ll need once you know what it is that you are converting and restoring, so be mindful of this before you set yourself a budget.
- Refinishing and painting is an exceptionally popular step in restoring furniture. Refinishing essentially means taking off the old finish, and replacing it with a completely brand new one. It requires more work than simply painting. Again, this is something you’ll have to take into consideration.
- It’s imperative that before you start, you must clean! Whether you’re restoring an old chair, or an old mahogany table, you need to remove the build up of dust before you whack the sandpaper out.
- Furthermore, safety is paramount. With any furniture restoration project, you should have the right equipment and use it correctly before embarking on any task, no matter how small it may be.
- You must already have a visual of what you want the end product to look like. This not only helps keep you motivated and inspired, but it enables you to work towards this version of the restoration, and not something completely different.
- The final thing to note, is that you must have a budget in mind. You don’t want a restoration project that is just as expensive, or even more expensive, than buying a brand new piece of furniture altogether. Have a maximum budget in mind and work around that to the best of your ability, it’s always possible!
We’ve chosen top 3 furniture restoration projects to help you kickstart your restoration process, from popular to quirky and distinct!
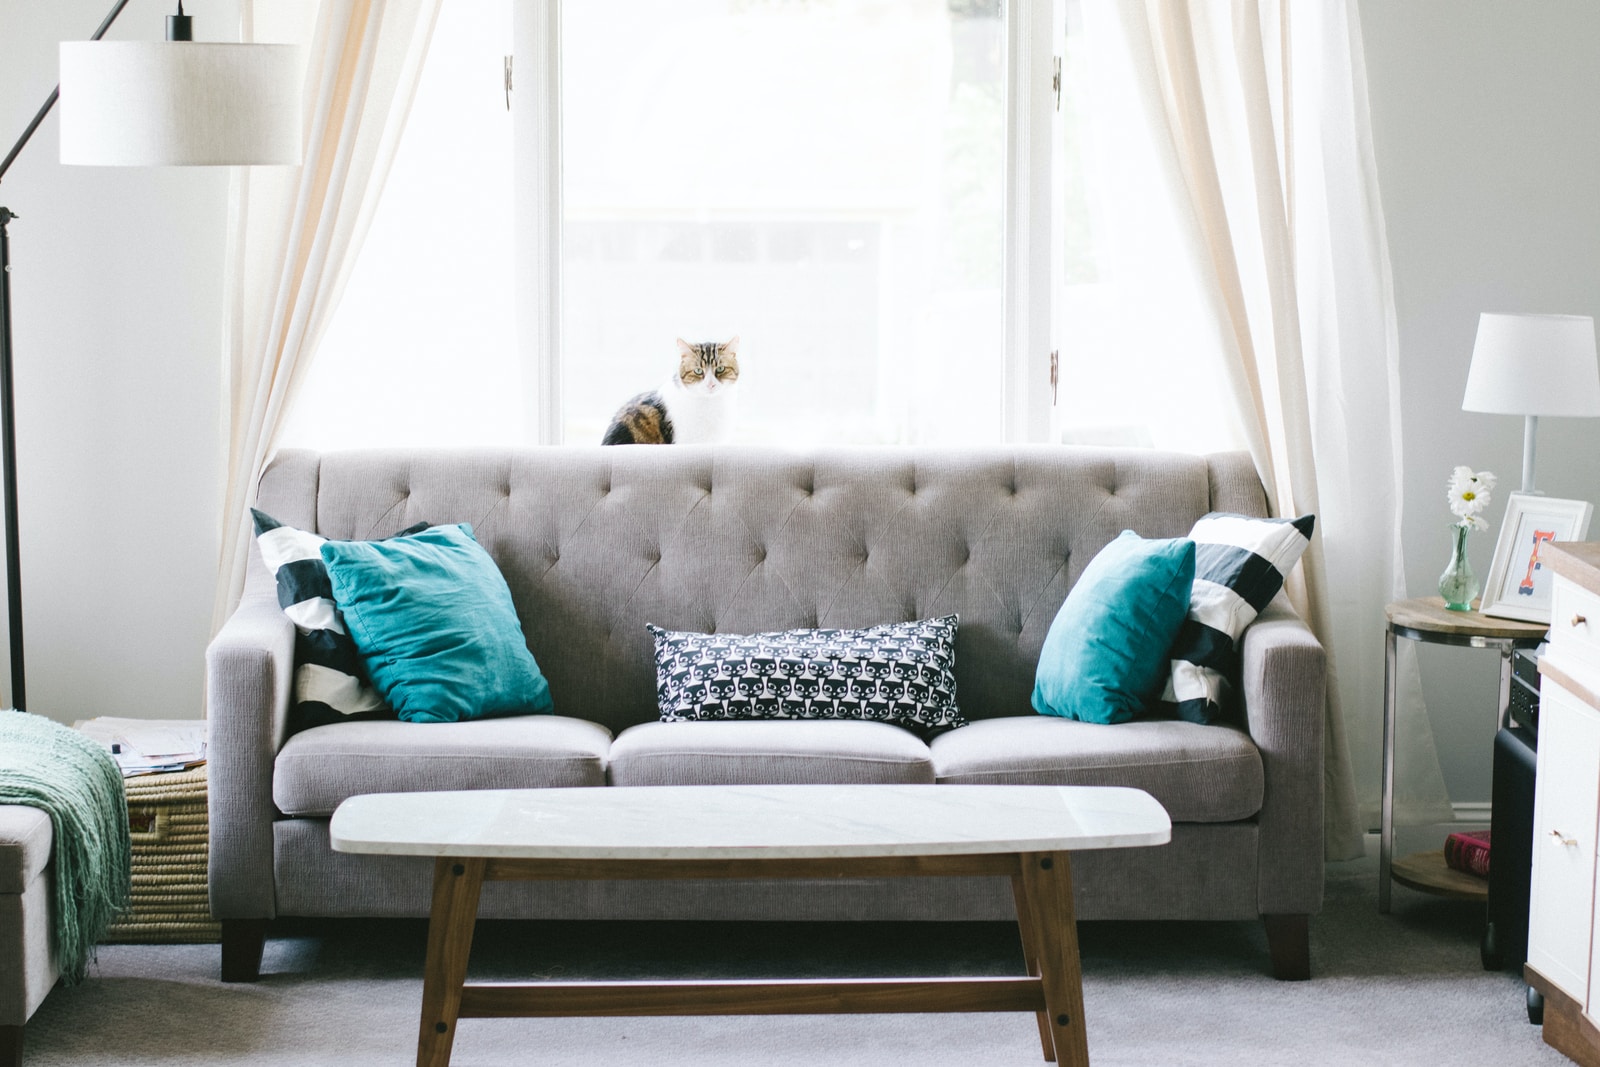
Restoring Old Chairs
Refurbishing old chairs is a common project that many undertake to enhance their home décor, and it’s easier than it looks! It’s essentially stripping back the chair, and finishing it off with your choice of material, whether it’s fabric or even leather. Restore your old dining or armchair into a timeless chair full of vintage character. For some inspiration, check out these 15 before and after chair makeover ideas.
What protective equipment do I need? We recommend protective gloves, safety glasses and a face mask.
Steps to Restoring Your Old Chair
- As the first thing you need to do when restoring a chair is stripping it right down to it’s core, you need to make sure you remove old screws and staples that are attaching the padding or cushion to the frame. This will allow for you to remove it freely without forcing anything and potentially causing further damage
- Remove the cushion or whatever padding the chair has. Once fully removed, take this opportunity to wipe down the frame, ensuring there’s no dust, or sticky residue that would get in the way when the real work happens
- For wooden frames, you can choose to add a varnish stripper in order to enhance the sanding process which occurs later on. Leave the varnish stripper for the amount of time it states on the tub or tin, and then scrape it off carefully using a scraper. This removes any old lacquer that was applied and leaves natural wood for you to work on
- Now you need to sand the chair, either manually or by using a power sander machine (which is usually quicker!). Bear in mind that for areas that are harder to sand down, you’ll need to hand sand this using different variations of sand paper (as each sand paper is different).
- After the sanding process has finished, it’s time to apply the finish. You choose what finish you’d like, whether it’s a matte finish, or you want to leave it natural. Finishing your furniture is often the most fun, and for chairs it’s common to use a chalk style paint. This is easily applied with a paintbrush, and the colour of your choosing!
- Once the paint has dried, apply chair wax all over as this helps prevent marks on the paint and maintains the paints look for longer.
- You’ve finished restoring the frame – now it’s time to upholster the cushion! Simply strip the cushion using a staple puller (as staples are widely used to keep cushions in place). Be careful with removing them and remove the cover that is covering the cushion so you’re left with just that!
- When it comes to restoring chair cushions, many people choose a pattern color, or even a plain fabric to replace the old one with. In addition, if the chair is part of outdoor furniture with cushions on it, the color, pattern, and fabric of the cushions are given more consideration. This is because they might be subjected to different types of weather. Even the cushion covers (learn more about outdoor cushion covers) that one chooses would be by keeping in mind various factors like durability, style, moisture repellency, etc. You’ll need to gather the right amount of fabric for your cushion – it’s kind of like wrapping a present whereby you place the fabric on the table or floor, put the cushion on top to measure, and cut accordingly! You may want to use a cutting fabric machine for precision if you do not feel confident in your manual cutting abilities.
- With a stapler, staple your fabric to the cushion. Start by stapling sides, as you’ll find the corners are the hardest and you wouldn’t want to have to start again. Work from the sides, then towards the corners, leaving a few inches from each corner.
- For the corners, you need to pull the fabric in each corner center towards the middle of the seat. Make sure you pull relatively tight and then staple into place. You ultimately repeat this process to form some sort of pleat and then trim off all excess fabric so everything remains neat and tidy. The final task is attaching a dust cover, and it’s the same process as cutting the fabric where you cut out the fabric for your cushion so just redo these steps!
Restoring an Old Piano or Musical Instrument
While there are many household furniture items that can be easily repaired or replaced, an old piano takes a little bit more effort and as they’re big investments to begin with, sometimes it’s harder to admit that they need a bit of TLC. However, for millennials they’ve become a statement piece in homes. Buying new isn’t always better, and there’s much you can do to an old piano, whether you want it as a centre piece in the living room, or you actually want to play it! There are many important elements that make up a piano, and as one of the most beautiful instruments on the planet, you need to be even more careful and delicate if you’re going to mess around with the mechanics. Whether you have a stunning Steinway & Sons upright piano that needs some TLC, or an incredible Bosendorfer, Bechstein, Kawai and more – they’re definitely a furniture piece that makes for great conversations and long lasting impressions.
Although it’s easier to restore the exterior of your beloved piano, the interior is another, slightly complicated story. We recommend getting in touch with piano experts in order to assess the interior. We’ve listed a range of techniques to restore your piano below:
- Let’s start with pedals and keys – these are the main piece of a piano, or at least, the most looked at, and used so they’re an imperative part of the stunning instrument. As each white key is made of spruce that is often covered in acrylic or ivory, they need to be cleaned regularly. This can be achieved through a water and soap combination!
- A small task that can make a huge difference, is the colour and finish of a piano. Just like refinishing an old chair, it follows a similar process. There are many different finishes on pianos, and if you’re wanting to give your piano a different finish, you can choose from a new stain, a new texture, a high gloss finish, or semi-gloss and so on – it’s all your choice!
- Restoring an antique piano adds to its value quite significantly
Restoring Old Cabinets
Restoring old cabinets has never been easier, and such a simple way to upgrade your old, worn out cabinets to switch them out for something that is more refreshing. If you’re looking to restore existing cabinets or you’ve just bought some new ones as a way to upcycle them, let us talk you through.
First things first, a good clean with a cloth and soap is required. Although you can paint on top of cabinets and furniture without cleaning them, it’s best practice to avoid insecurities when the final coat of paint is applied.
Cabinets can be in the form of standalone cabinets you’ve had seated in your living room, bathroom cabinets for storage, or even kitchen cabinets that need a bit of a transformation. In our example we’ve showcased kitchen cabinets and the difference a bit of paint and care can make!
- Clean the cabinets with clean warm water and soap. If you need to be a bit more vigorous, either use CIF, which helps fight stubborn marks and stains. Alternatively, ‘the pink stuff’ which is also known as miracle paste, also works wonders – gentle on surfaces but of course, tough on stains!
- Remove the handles (you can leave the hinges on if you’re only painting the exterior). For the handles it usually just requires a screwdriver or a gentle drill if you’re looking to be quick with it. Place in a bag and make sure you don’t lose any of the handles or screws for each
- The initial process of giving your cabinets a makeover starts with priming. And you have to be quite careful with choosing what primer is best suited for your project. Kitchen cabinet primer will be different to primer you’d choose for a bathroom because of it’s environment. Ultimately, you want a resin based primer that is a sealer. This means that nothing will bleed through and it forms a solid foundation for the final coats of paint to go onto. We recommend opting for an oil based primer as it’s durable and easy to use. It can go a long way too depending on the brand you buy! Looking at the surface of your cabinets is important when it comes to choosing the primer as well, as if you use the wrong primer over oak wood, it can be difficult to recover from. Here’s the primer we used:
- Undercoat primer
- Quick dry cupboard paint
- For kitchen cabinets, it’s ideal to use a relatively small roller (around 4 inch). Paint rollers provide a more smoother finish, as well as thin, even coats. Because of this, the surface holds more paint and distributes even layers more efficiently. Start with one coat of primer / undercoat and use the roller to paint the cabinets. Leave to dry and ensure you read the instructions on the back of your tin.
- If required, add another coat of undercoat until your cupboards are evenly covered. Evidently, the darker the cupboards, the more coats you’ll need.
- Once the undercoat has been applied, it’s time for the coats of paint – our example below is a cream ivory, but whatever colour you choose, you have now completed the foundation needed for applying the final layers.
- Use the roller again to apply your preferred paint, it may require one coat, or two. Allow one coat to dry before applying another.
- Once dry, reinstall the handles
- You’re all done and yes it’s that easy.